Process Template and Workflows
In this section, we will look at how to create a basic process Template using a Class Object and add a workflow using Roles to that Process
Process Template Creation
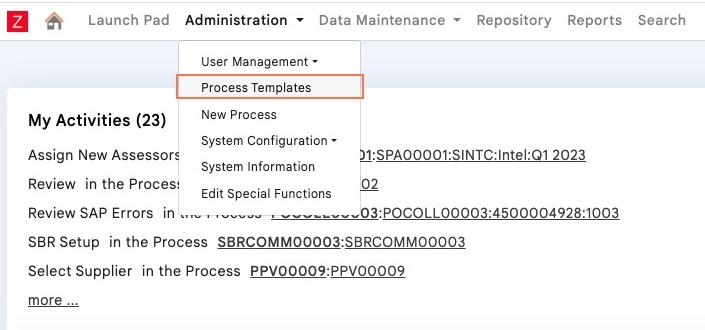
To get started with creating a Process Template, navigate to the Process Template Section under Administration. This is illustrated below
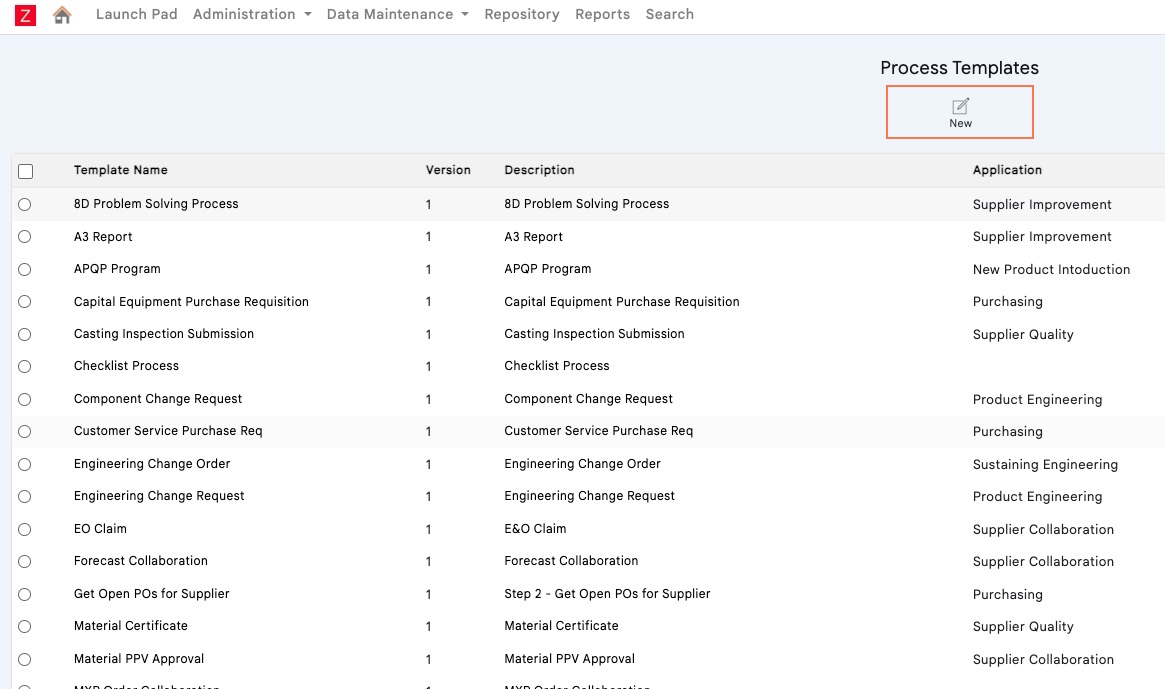
Once you navigate to the Process Templates Menu, you will see a list of all the Processes present within the Zflow Application. Click on the Create New button as illustrated below
Once you get to the New Process Creation menu, you will see a few fields. Carefully follow the next steps and only fill in the fields that have been highlighted. Make sure not to fill in anything else.
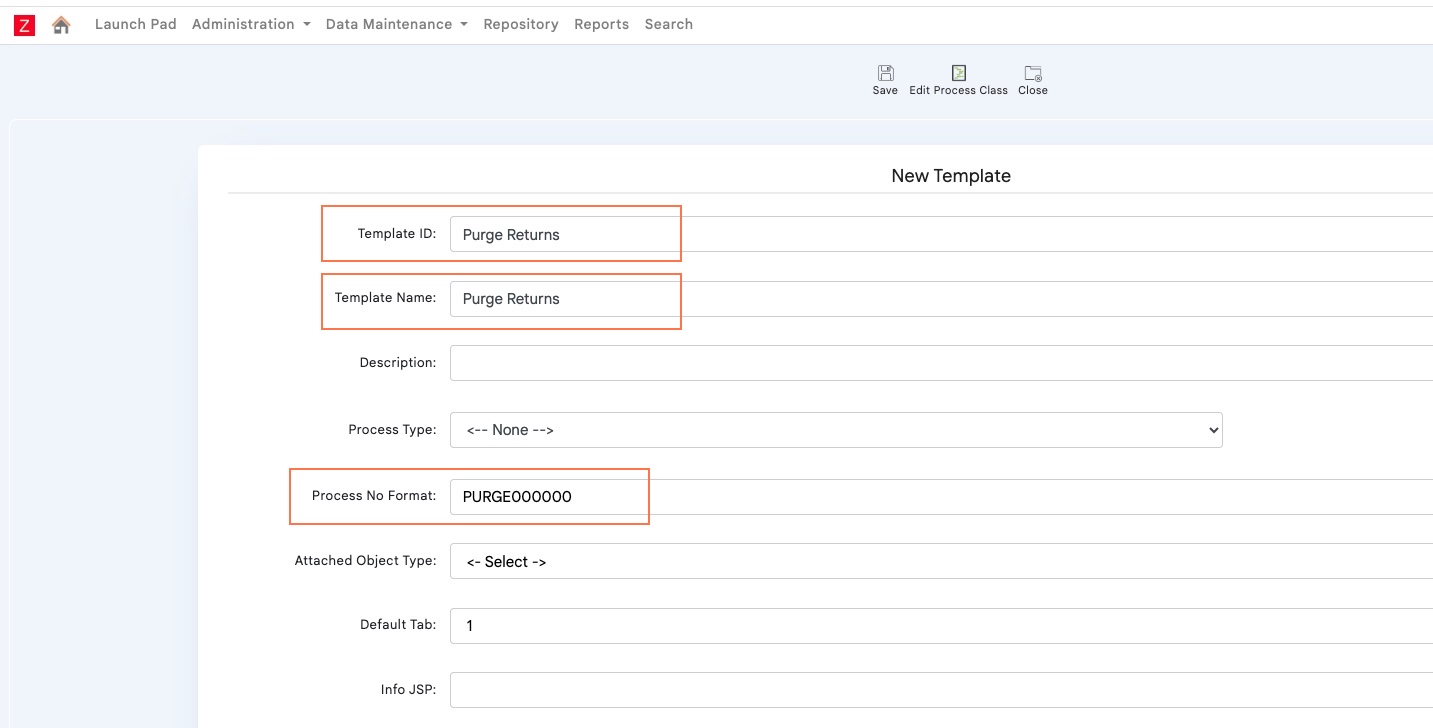
We are going to name this template Purge Returns in this case. The Process Format needs to be 11 characters long and as a good practice, make sure the last 4 digits end with 0000. For this case we will use the Format Name as PURGE000000.
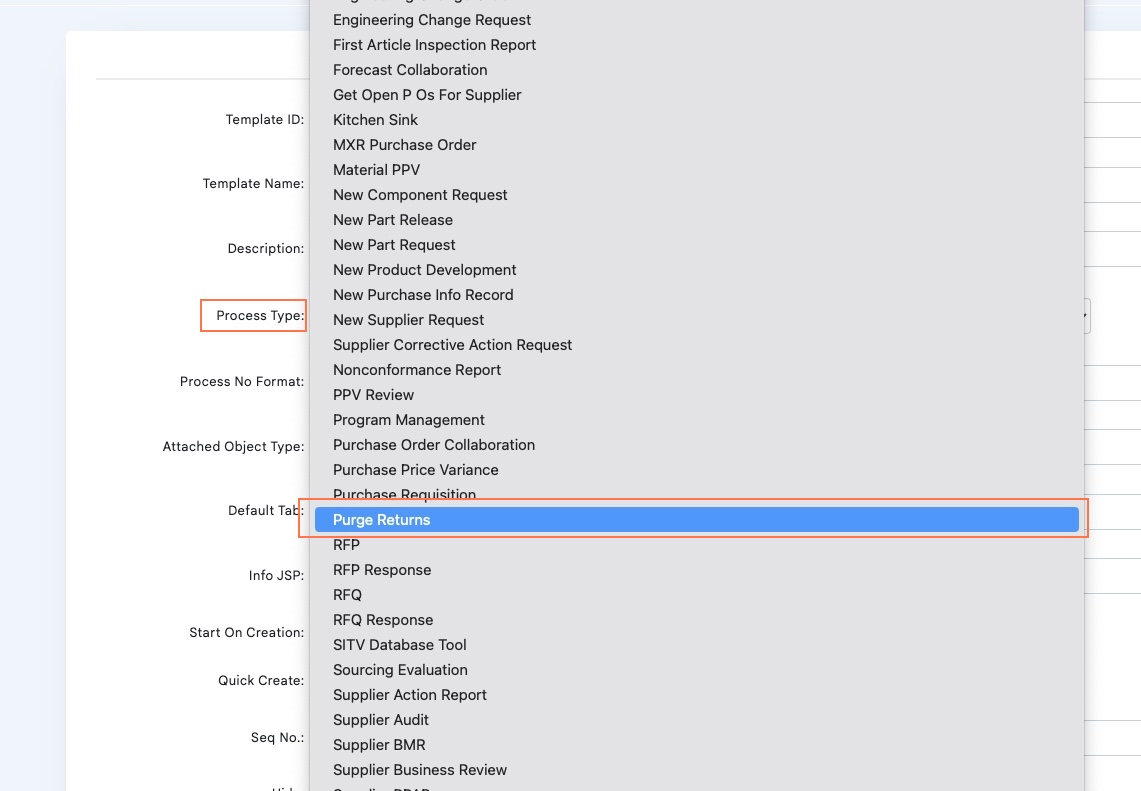
Next, we will have to select the Class Object that this process will be based upon. Select the Process Type Drop down menu and make the correct Class Object Selection. Since this process is for Purge Returns, Select the Purge Returns Class object.
Once you have filled in all the data, your screen should look like this. You can also set the below highlighted section to Yes for both cases.

Click on Save once you have finished all of the above settings

Once you have successfully saved the Process Template, you should see a bunch of new Icons in the Taskbar

You have successfully created a New Process Template named Purge Returns. We will now look at how to set Roles and how to add the workflow to this Process Template in the next Section.
Process Template Configuration – Roles
In this section we will look at configuration of the Process Template. We will look at adding Roles and Members to this Process.
Navigate to the Process Template Section under Administration as shown below

Once you navigate to this section, you will see the list of Processes present with the Zflow Application as illustrated below. You should also see Purge Returns within this list.
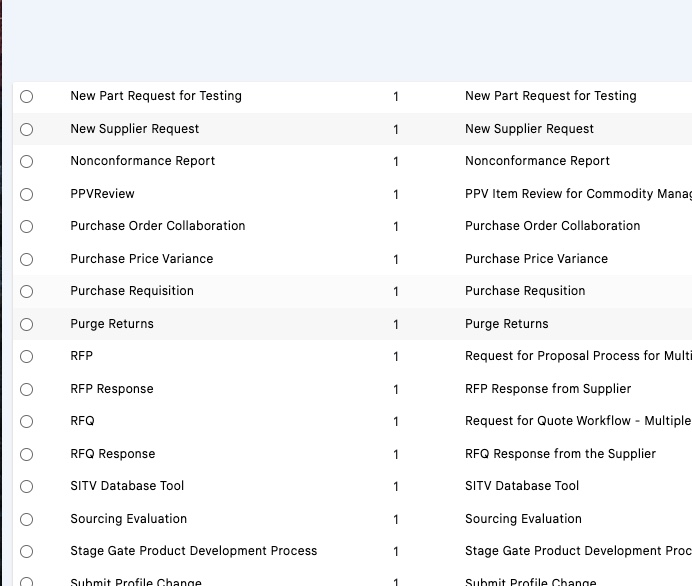
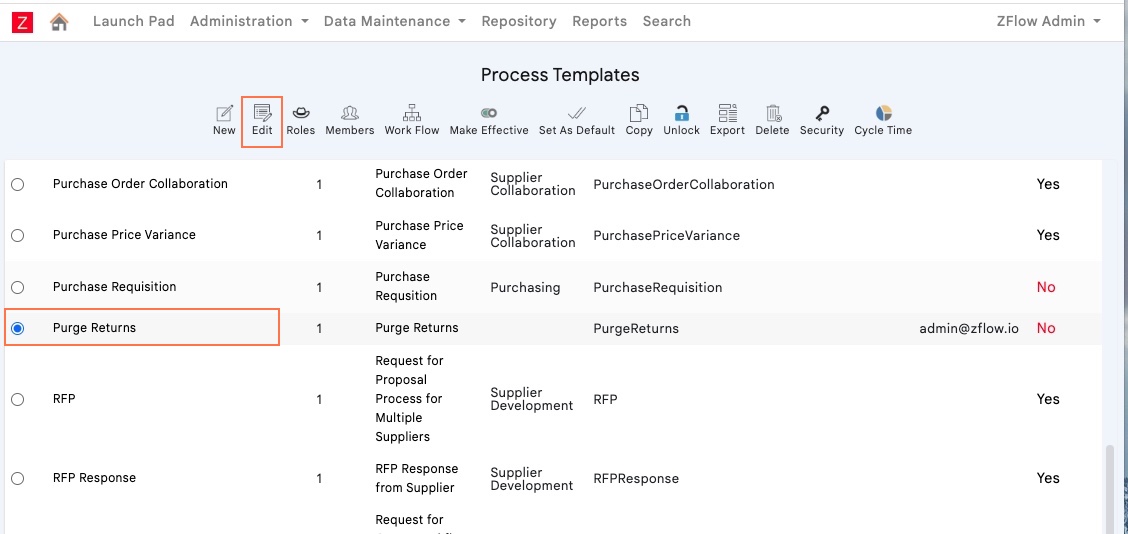
Select Purge Returns and click on the Edit Button. We will list out the other functions in a separate section but for now we will look at the basics and learn how to Add roles and create a workflow
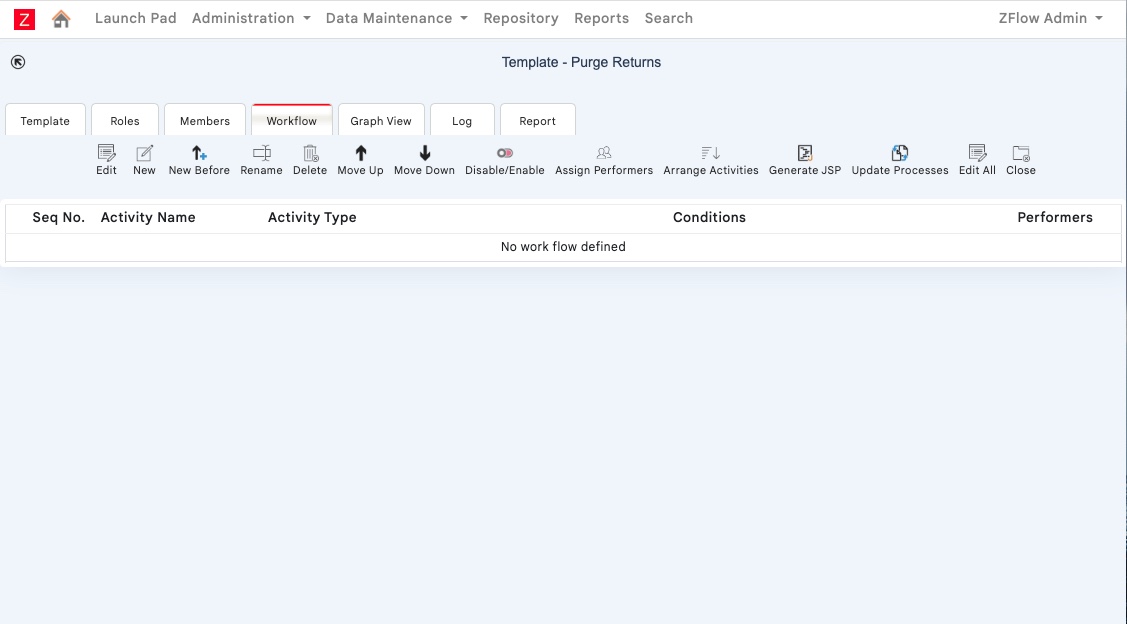
Once you click on Edit, you will land in the Configuration Page of the Process Template. It should look like this
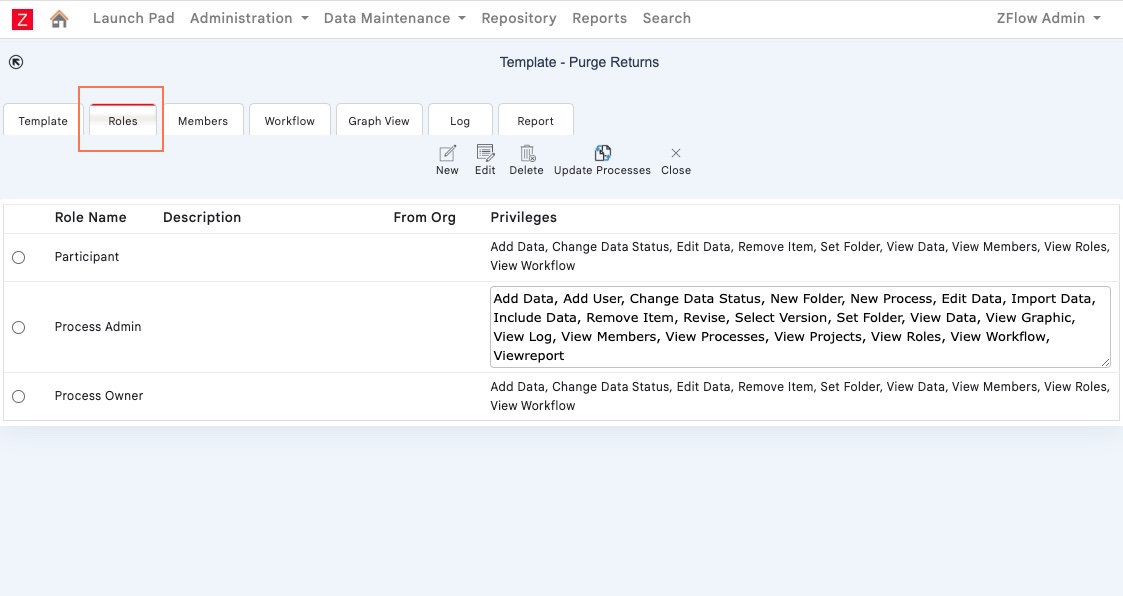
Navigate to the Roles Tab as shown below. You will find a few roles already present by default. The Process Admin is the role with the highest level of privileges.
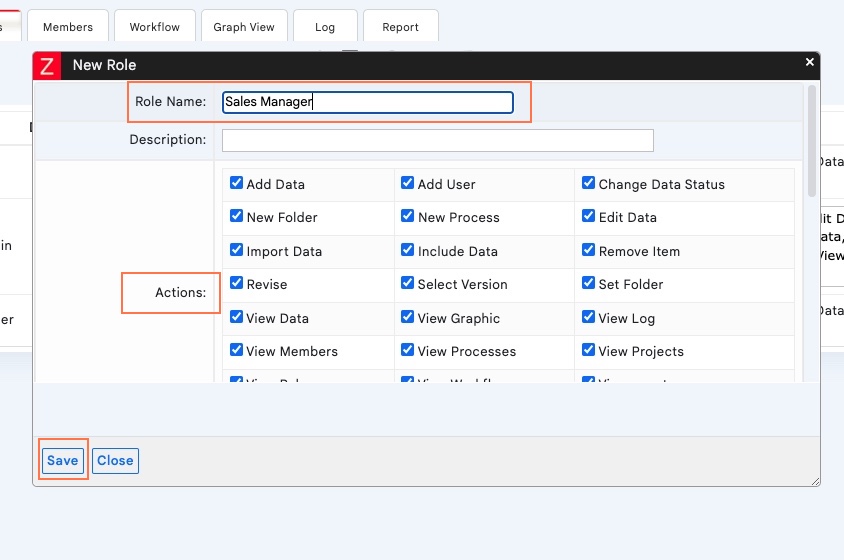
We will add a new Role called Sales Manager to this particular Process Template. To do so, click on the New Icon

Here, you can enter the New role that you wish to create. You can also toggle the allowed actions for that particular role. Hit save once you are done with entering the necessary Information. We are going to create a sample role named Sales Manager as illustrated below
Once you have created the New Role, it will be visible in the list as shown below
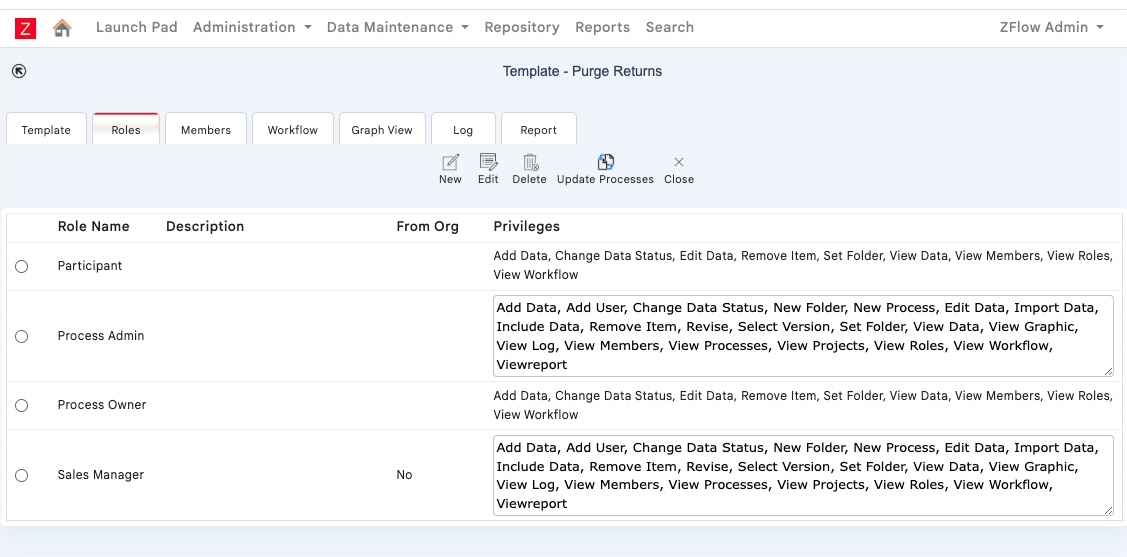
This is the general process of adding new Roles to a Process Template. These Roles can then be assigned to Users within the workflow.
In the next section, we will look at the process of assigning a Role to a particular User.
Process Template Configuration – Users
Every User with access to a Process or the workflow must have an assigned Role. Without a Role, they will not be able to access the workflow.
In this section, we will look at how a Role is assigned to a User
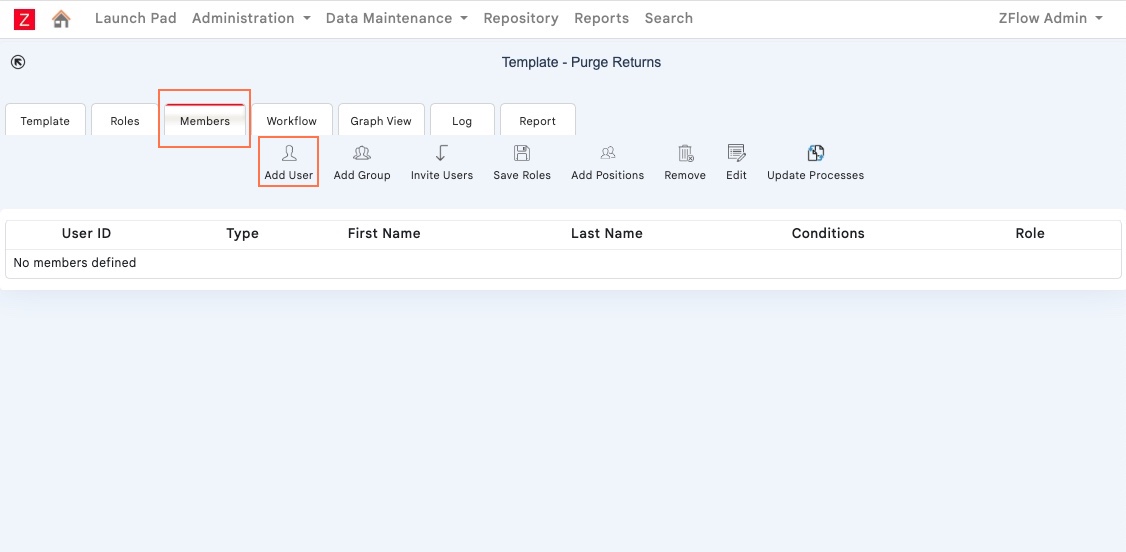
Start by navigating to the Member Section of the Process Template Configuration. It will initially appear blank since there are no users added to the Process yet.
Click on the Add user which opens a search function with the available list of users.
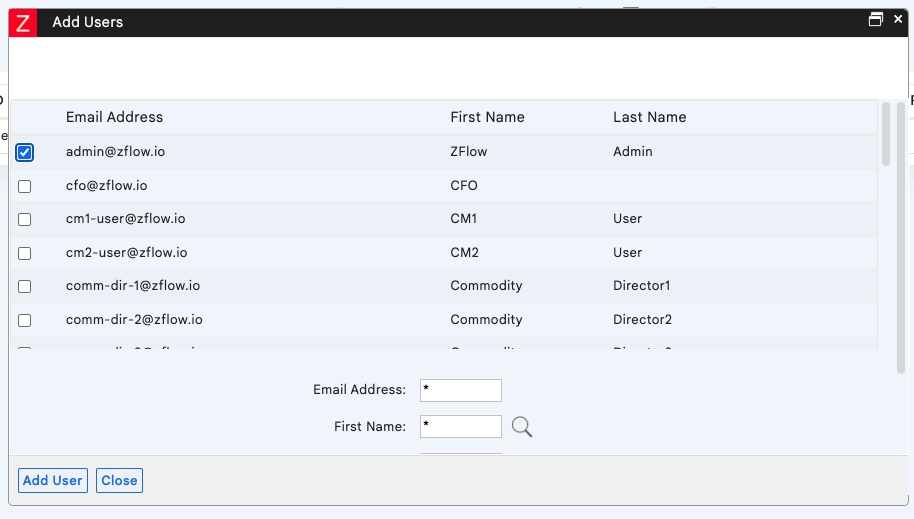
Once you click on Add user, you get the search function for Users as seen below. You can select your desired Users from the list or use the search function to look for narrow down the list to specific users.
For this particular Template, We will add the Zflow Admin as one of the users.
Once you have added a User, the User ID and other details will be available under the Members Tab as shown below
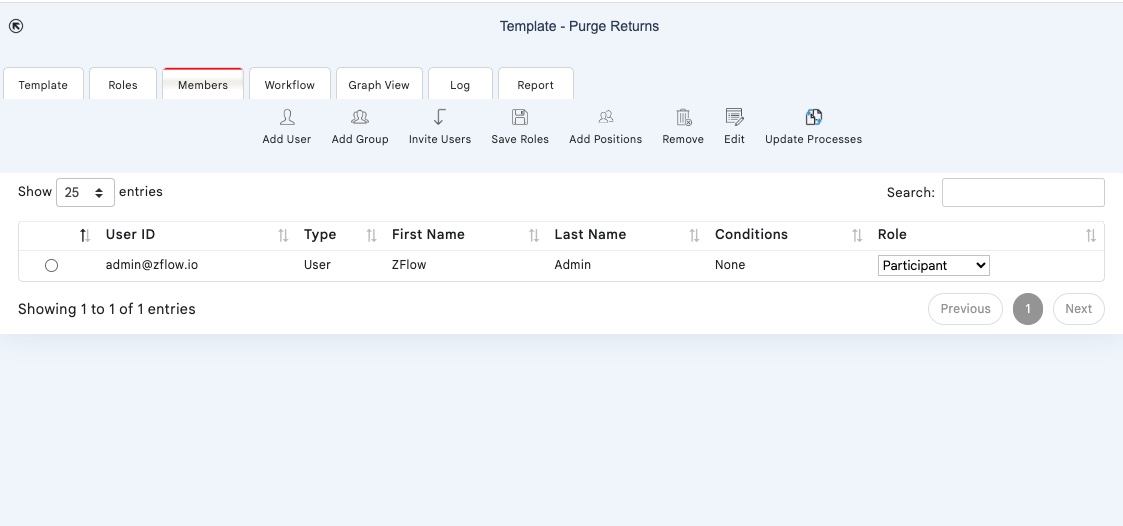
We will now proceed to assign a role to the user. In order to do so, select the Role drop down list
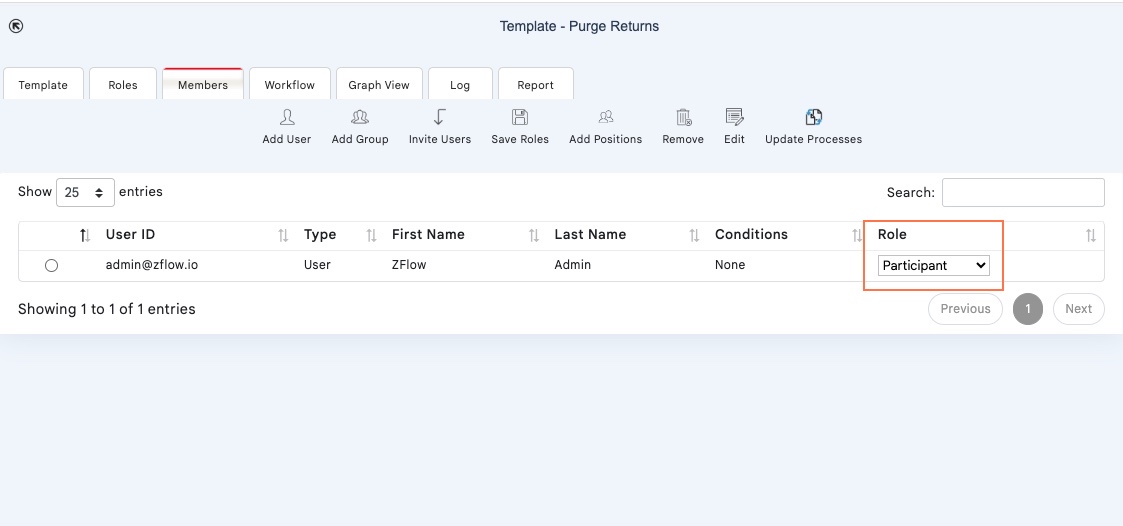
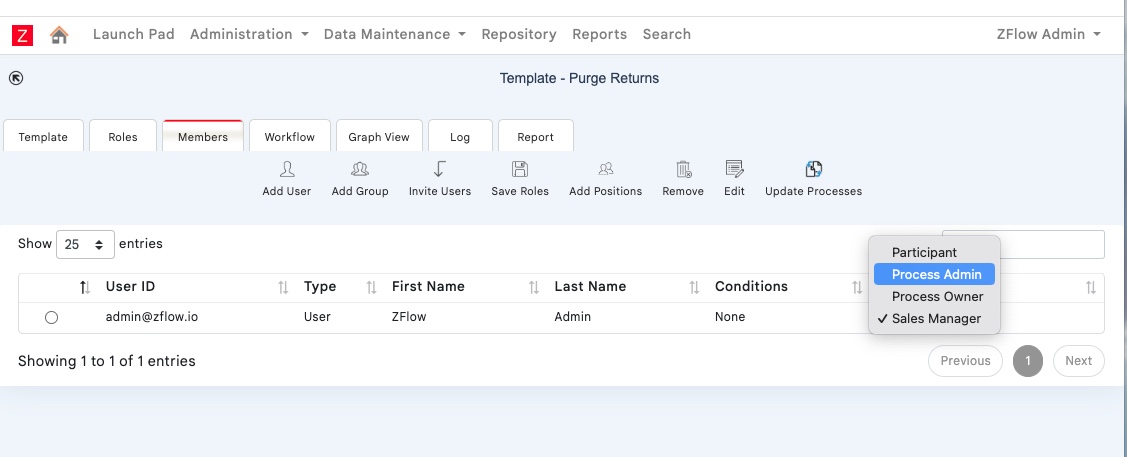
The drop down list will have all available Roles within the Process Template including the one we added in the previous section. For the admin user, we will select the Process Admin User role since this comes with the highest privileges.
Thus, we finally have a Process Admin Role assigned to a User
You can similarly add another user under Members and assign them to the Sales Manager role.
A single user can also be assigned multiple roles. This is quite easy to do, just add the same user under Member Section multiple times and assign them a different Role for each instance.
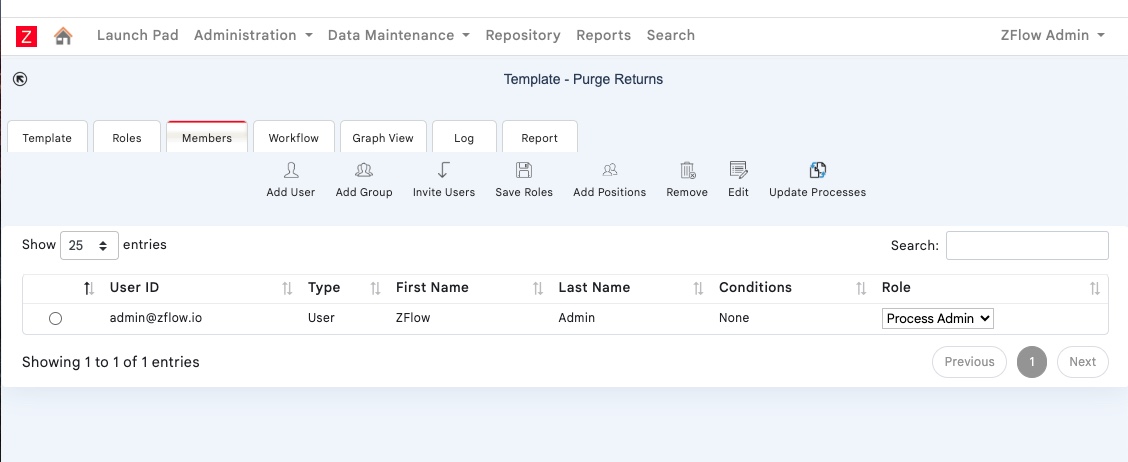
Now that we have our User with an assigned Role, we can create the Workflow.
Process Template Configuration – Workflow