Setting up Alerts on Azure
This section will deal with setting up alert rules on the Azure Loadbalancer. There will be 2 main components to this.
- Creating the Alert rule
- Creating the Action group to be used in the Alert rule
For this process, we will create the Action rule before we move on the Alert rule. This is because the Action group is crucial to the creation process of the Alert rules.
Creating the Action Group
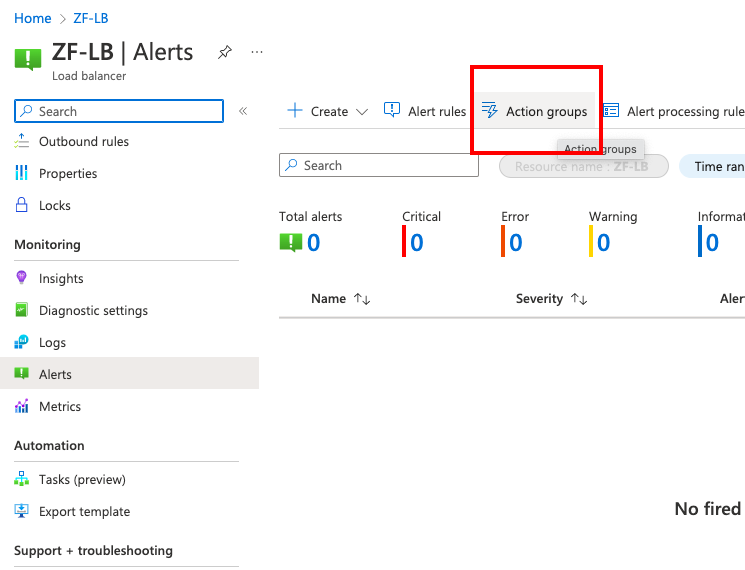
Navigate to the alert tab under the loadbalancer sidebar as shown below and click on Action Groups at the top.
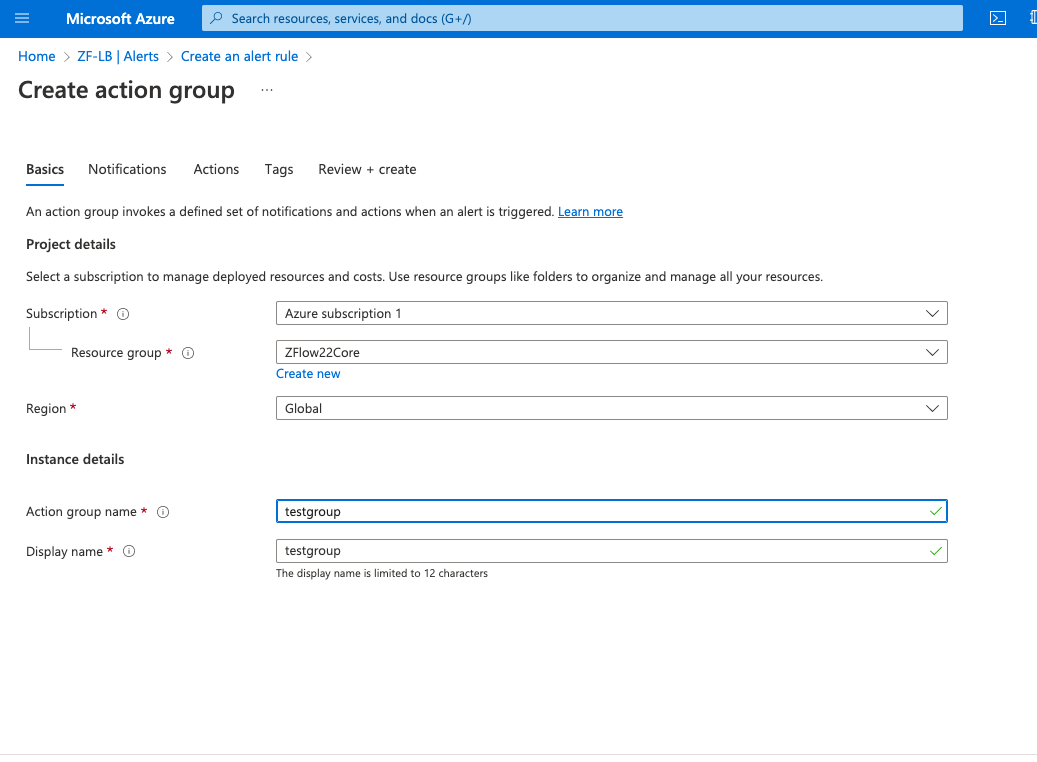
From here, click on create new Action group and make sure it is within the same resource group as your loadbalancer. Set the region to global and give a name to your action rule before moving on to the notifications section.
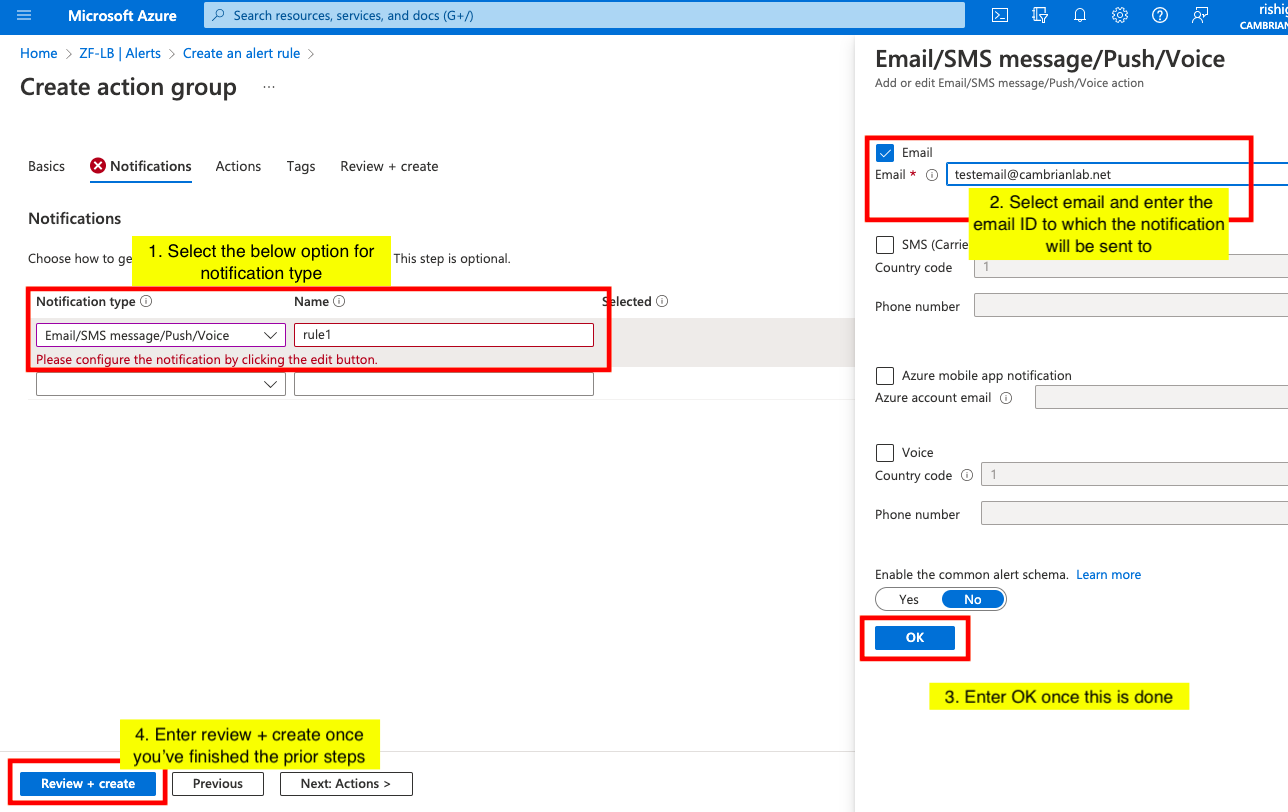
Under the notifications section, follow the instructions displayed in the image below before creating the action group. You can also create multiple such notification rules for multiple email addresses.
Once this is created, you should be able to see this under the action group list. We can now move on to creating the alert rule which will use the action group created above to send out emails to users in case of a failure or a safety threshold rule being exceeded.
Creating the Alert Rule
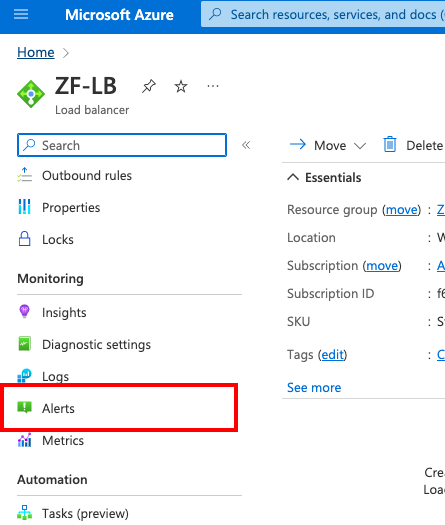
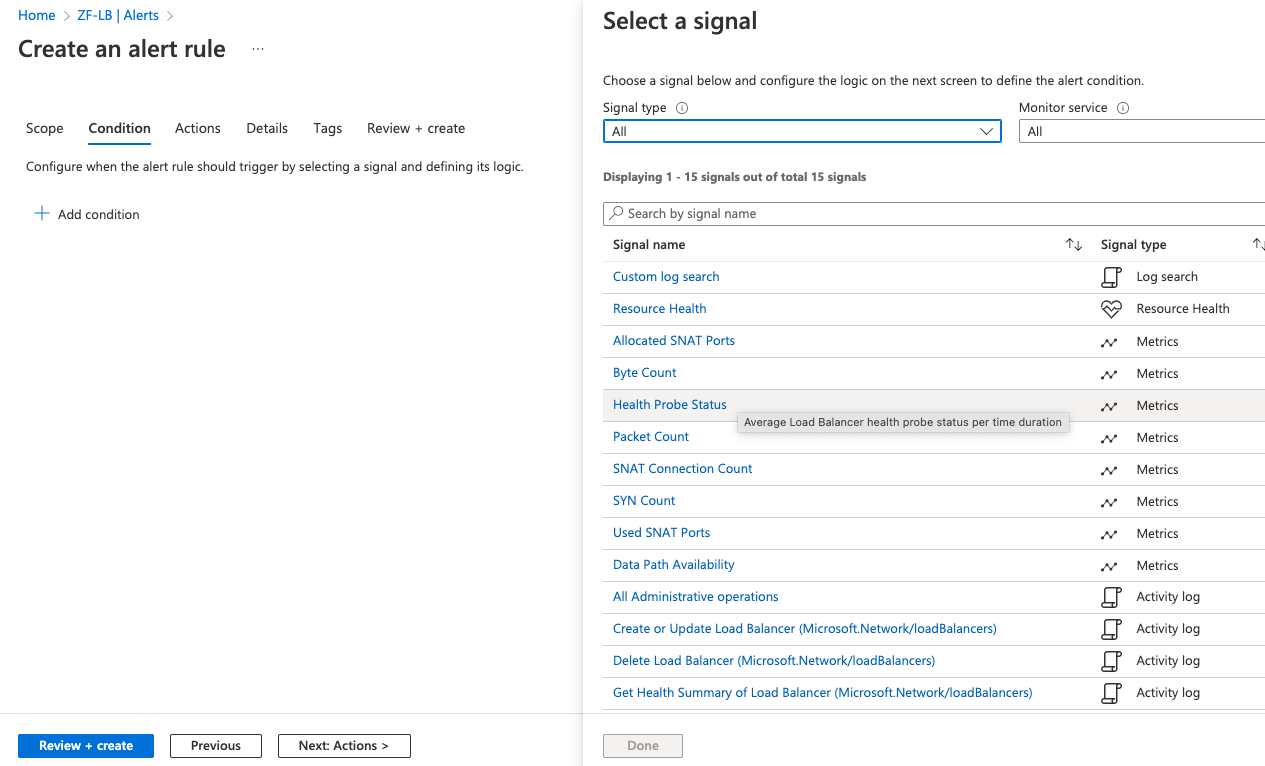
Navigate to the alerts menu under the Loadbalancer sidebar and click on create New Alert rule.
Once here, click on Health Probe Status under the Select a signal Option.
Once selected, you will be prompted to set the alert logic and evaluation time for the condition. Enter the following values as shown below in the selected fields. You can also modify these values as per your specific requirements.
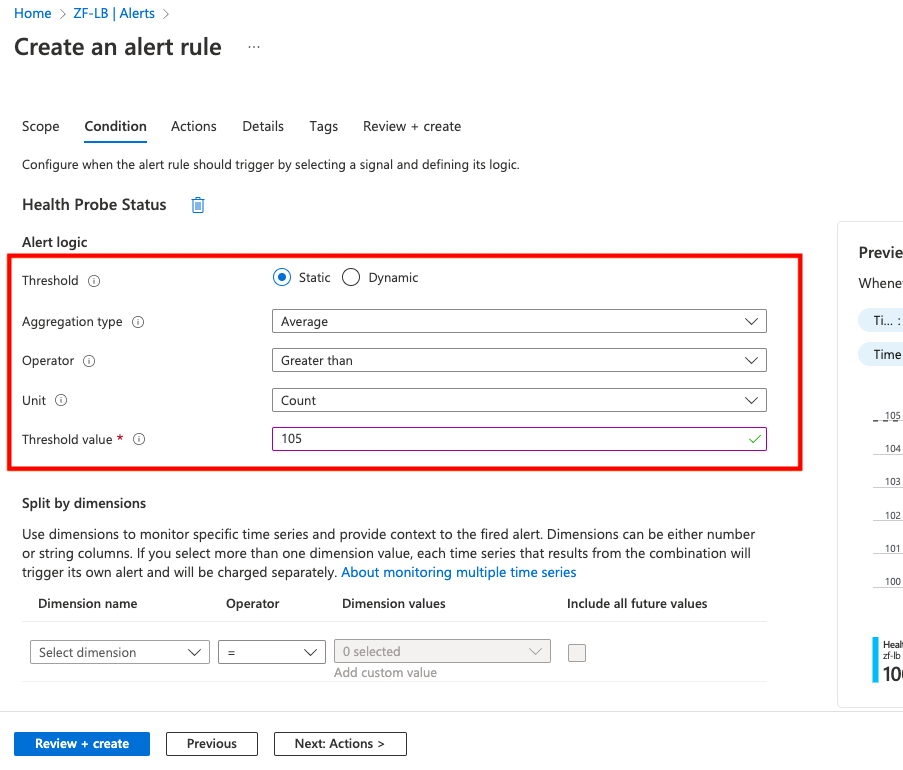
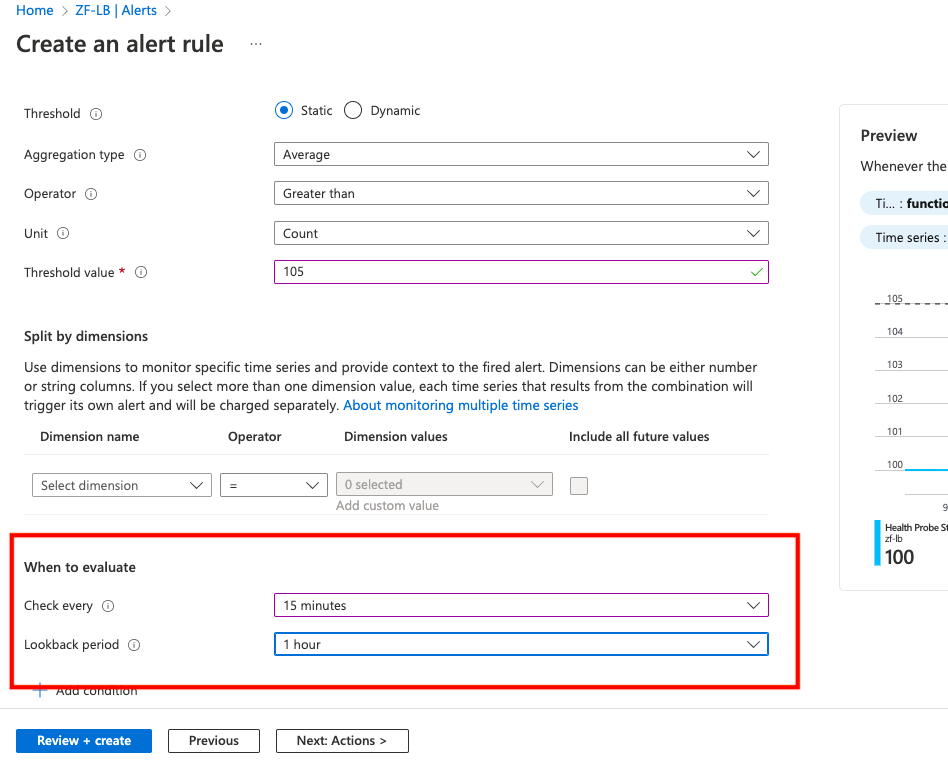
The evaluation time is ideally set to 15 mins with the lookback period being 1 hour.
Once these 2 are set, we move on to selecting the Action groups. Here we will select the action group that we have created earlier.

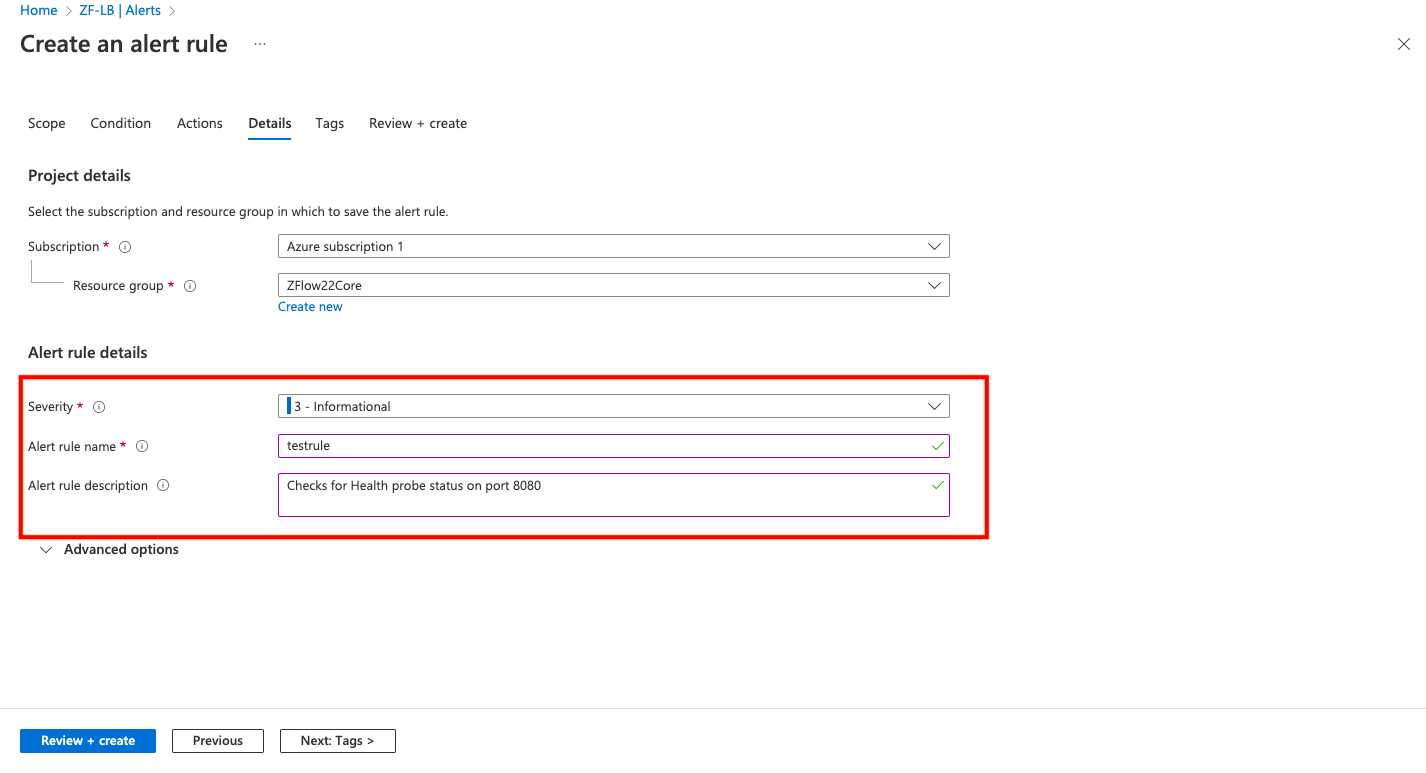
Once we have our Action group selected, we will move onto the details. Here we can modify the severity scale but we will ideally set it at 3. You can name your Action group and give a thorough description on it’s functions for the other users.
Make sure it belongs to the same resource group as your Loadbalancer.
Once these fields are filled out, you can click on review + create to do one final review of all the details and create the Alert rule.
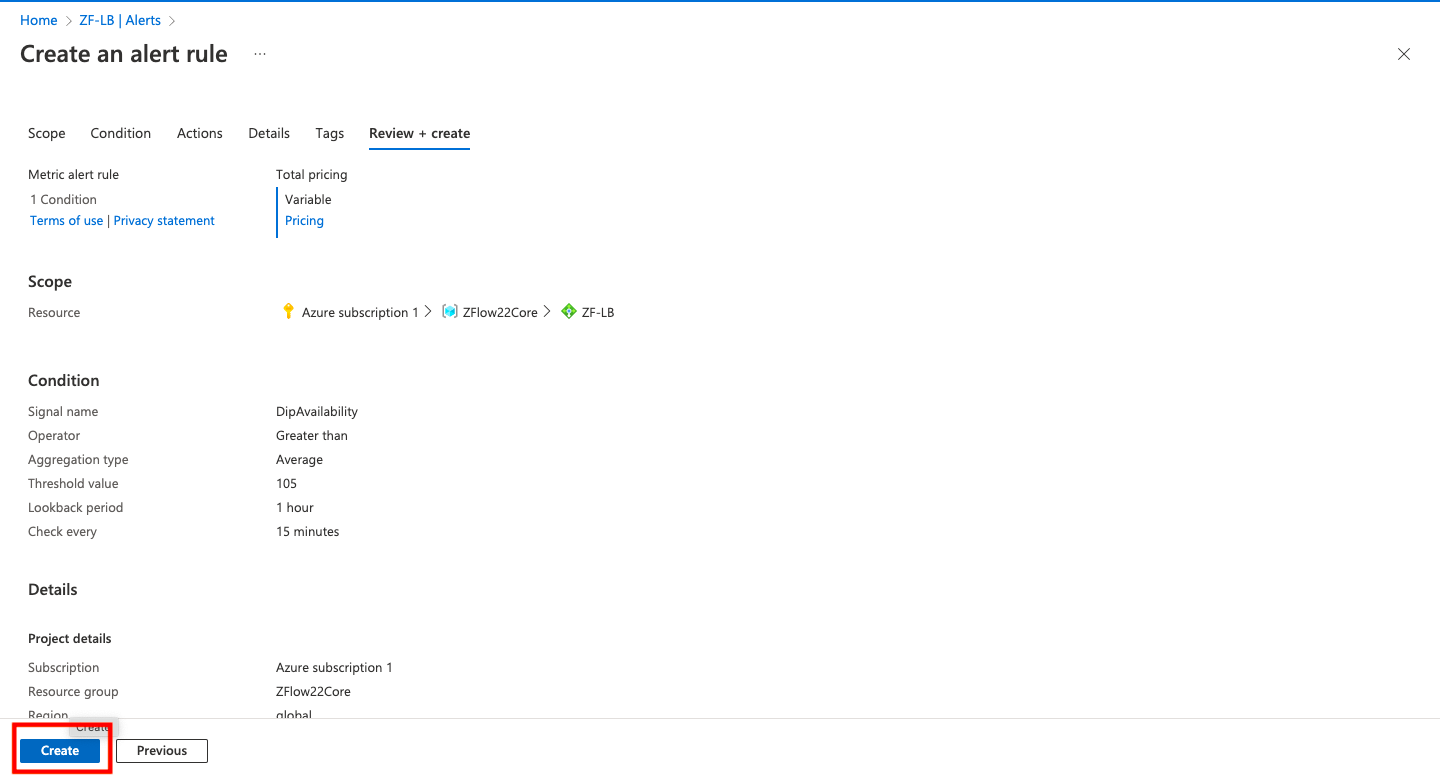
Hit on create once you’ve finished reviewing all the details. The rule should take a few minutes to become active and send out alerts when the port 8080 isn’t reachable.
To test this out, stop tomcat on your Zflow instance associated with the loadbalancer. Within a few minutes, you will receive an alert on your action group registered email. Once the working of the rule has been confirmed, start tomcat back up on your zflow instance.