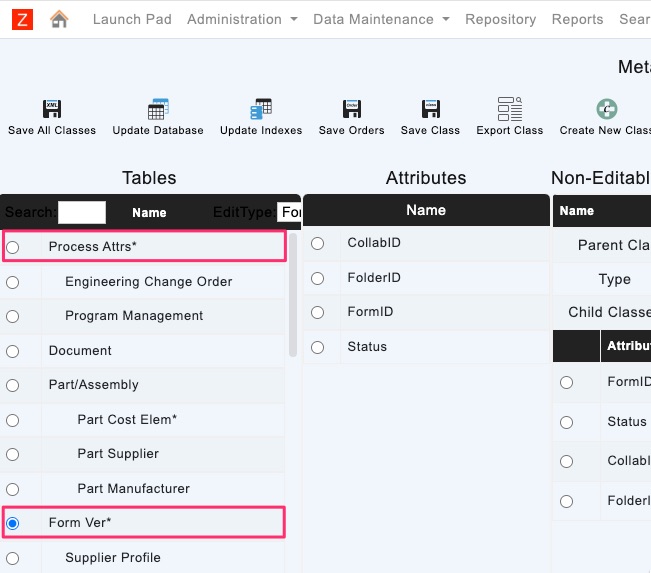
You learned about Process (Form), Data Classes, and Admin Classes in prior posts.
This section will cover class design, which applies to all types of classes in ZFlow.
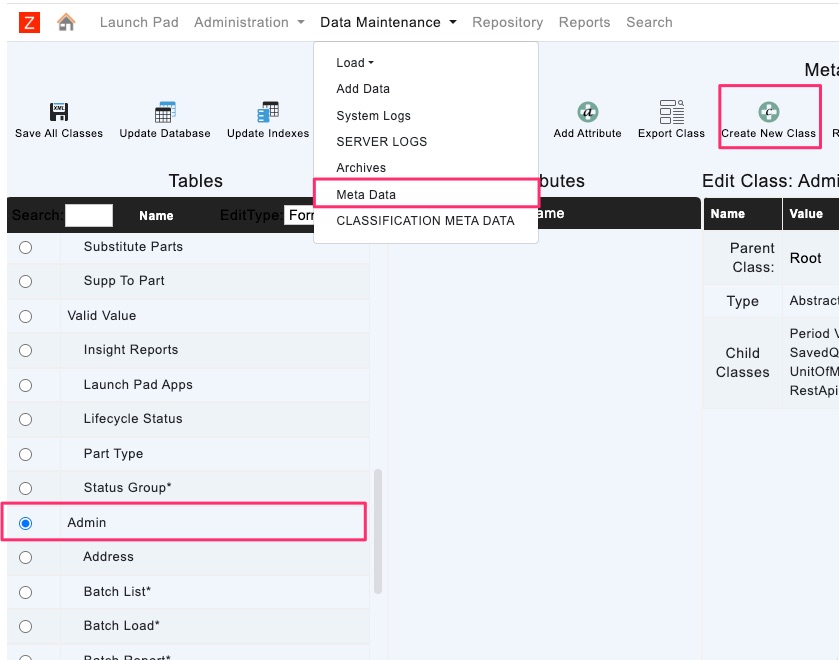
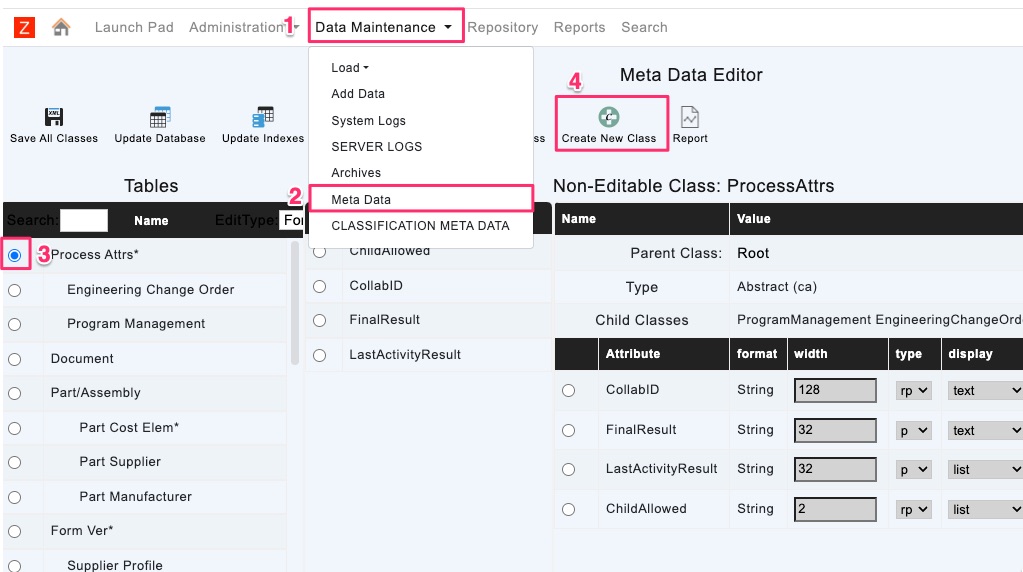
New classes are generally designed as children of ProcessAttrs (Process Form), FormVer (FormVer), or Admin classes
Type in the new class name in the dialog box. Review class naming rules and conventions here. Select OK to create the Class.
You should see the new process form class under ProcessAttrs as shown below. Notice that the Recordsa has value of -1. It means that the database table is not created.
You can “Update Database” to create the database table for the class
You will now see that the number of records as 0. Zero or a positive number indicates that the table for the class exists in the database.
Adding Attributes to the Class (Workflow Form Attributes)
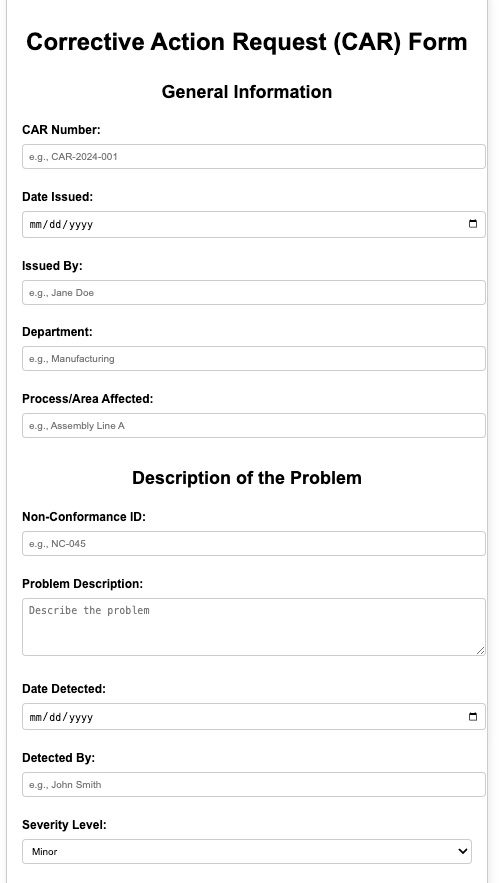
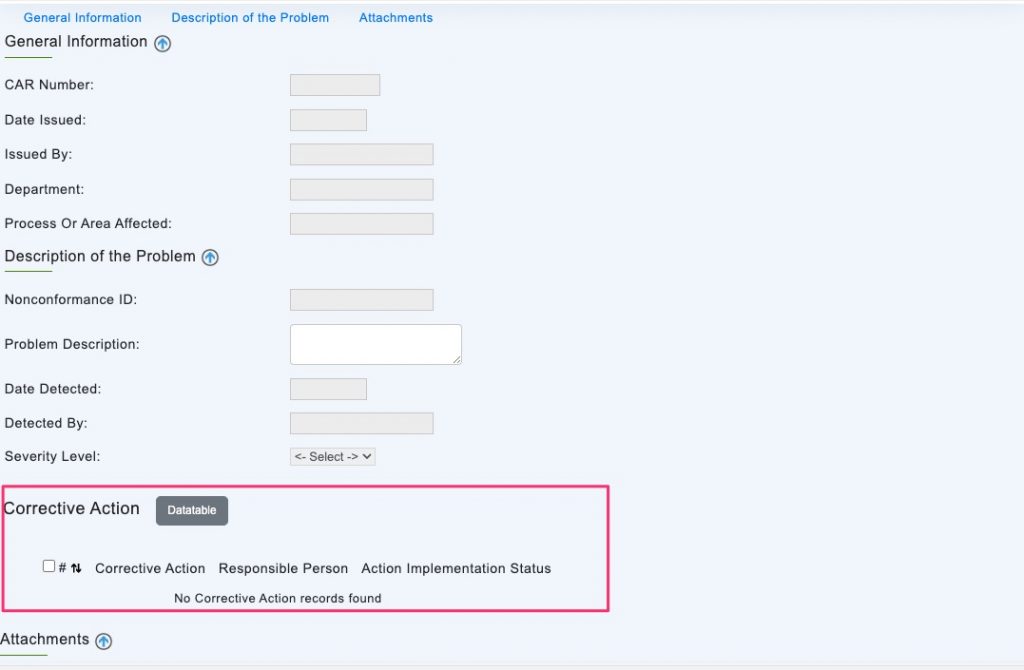
The next step is to add attributes (aks fields) to the form. We will use the example form below to add workflow form attributes. In the example below, we have text, date attributes, and how the fields are displayed (text, area, drop-down values). Learn more about Class Attributes.
We will create the following attributes to represent the above form fields. Learn more about Class Attribute naming conventions and rules.
- CARNumber(String) to be shown as a text field
- DateIssued(Date) to be shown in a text field
- IssuedBy(String) to be shown as a text field
- Department(String) to be shown as a text field
- ProcessOrAreaAffected(String) to be shown as a text field
- NonconformanceID(String) to be shown as a text field
- ProblemDescription(String) to be shown as an area field
- DateDetected(Date) to be shown as a text field
- DetectedBy(String) to be shown as a text field
- SeverityLevel(String) to be shown as a drop-down list
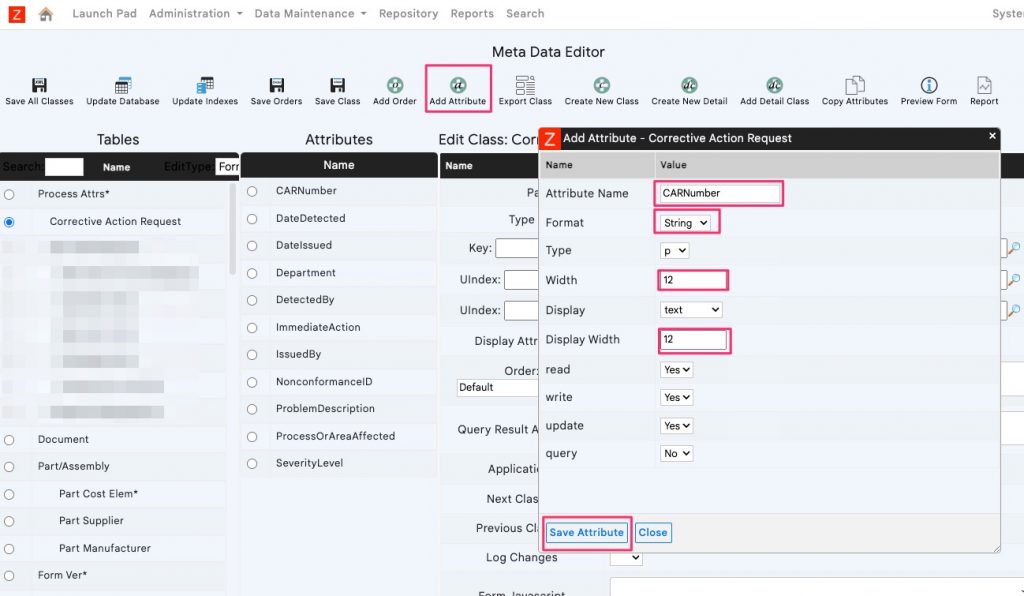
You can add attributes to the class by selecting the class in MetaData Editor and selecting the Add Attribute button. A popup window allows you to add attributes to the class.
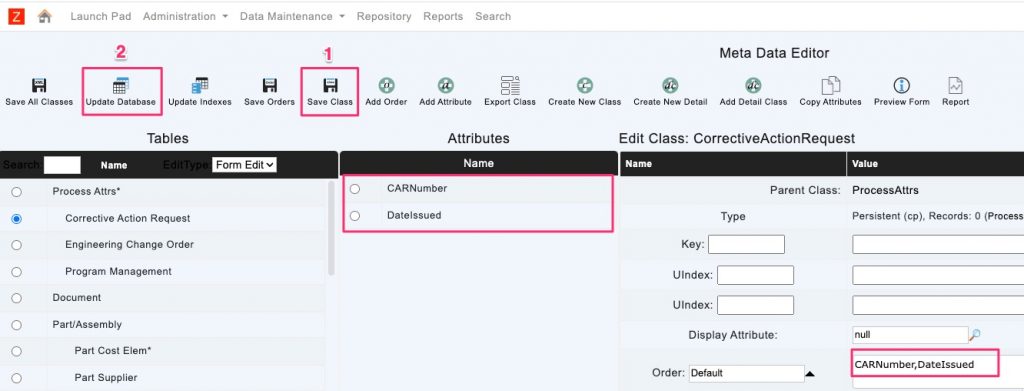
After configuring the attributes, save the class and update the database to create the table and fields in the table for the workflow form.
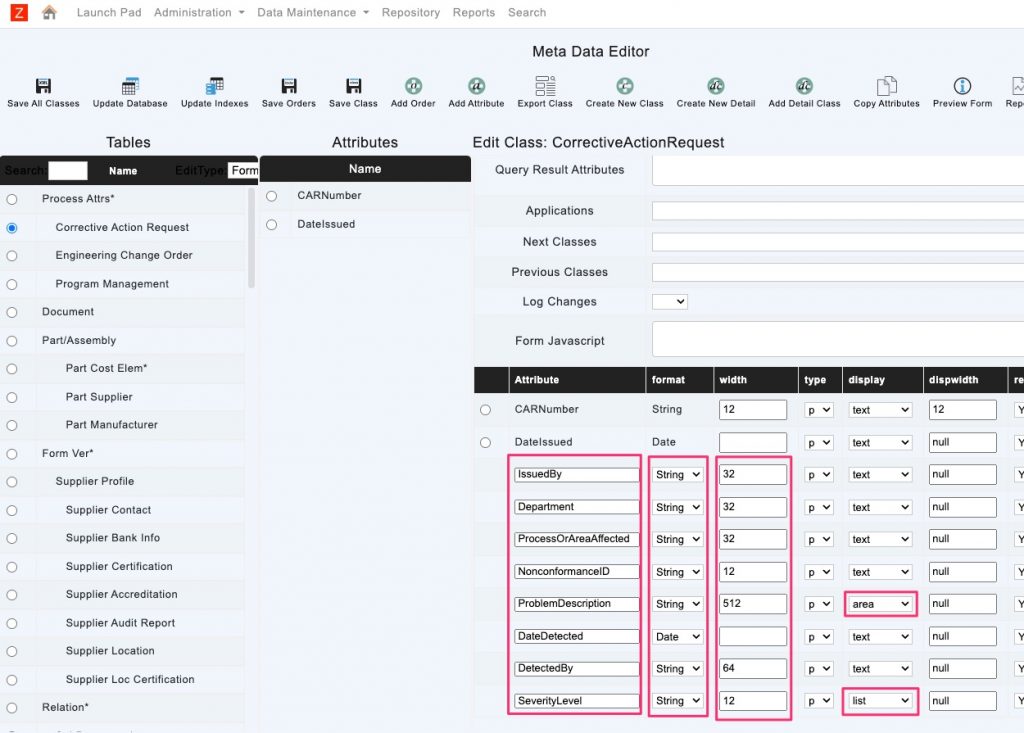
Continue with the class design by adding the remaining attributes as shown below
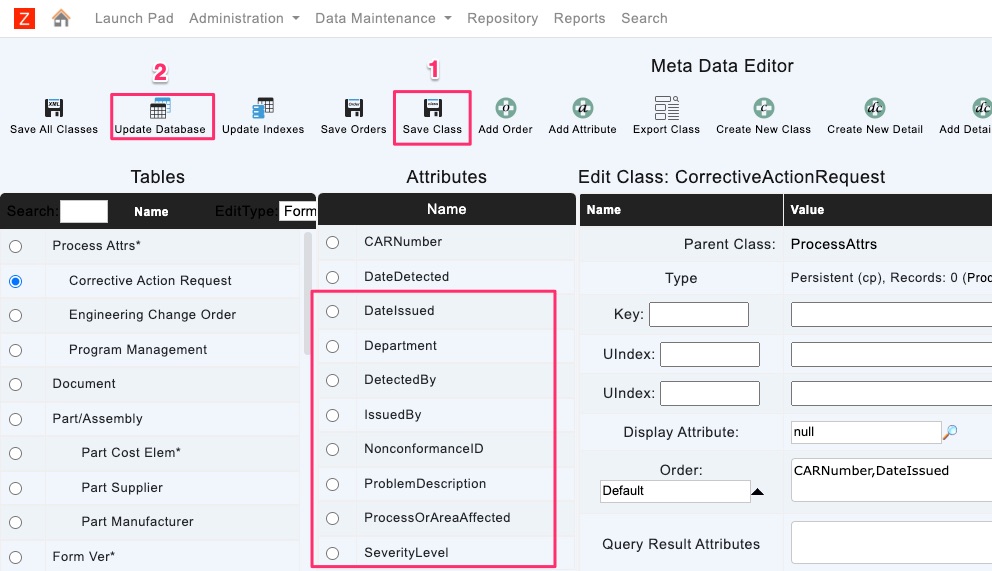
Save Class and Update Database to continue. You should see the newly added attributes listed as shown below
Adding Form Orders (Sections of the Form) and Assigning Attributes
The next step is to add Orders (Sections of the form) and assigning attributes to the orders. In the example we can see that there are 2 sections, General Information and Description of the Problem.
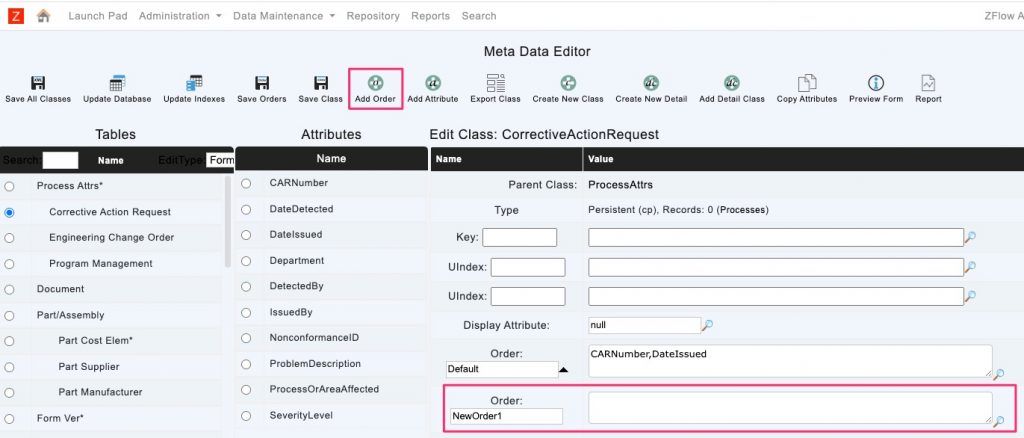
You can add an order by selecting “Add Order” as shown below.
Rename the orders
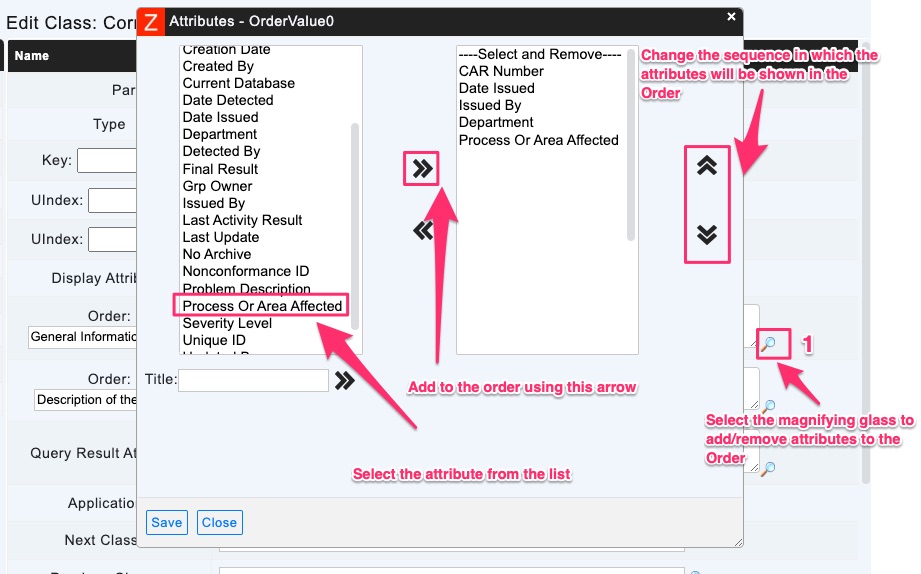
Select attributes to be included in the orders.
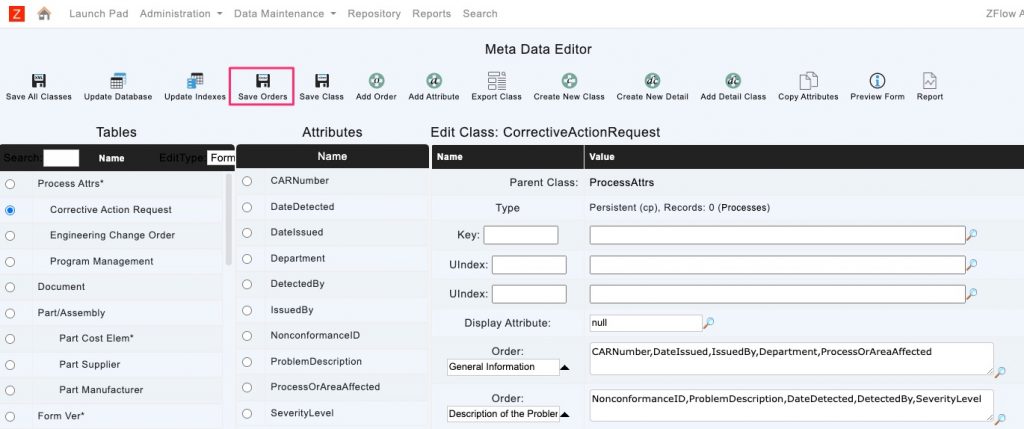
“Save” to assign attribute to the order. Once the attributes are assigned to the orders, the class definition should look as shown below. Select “Save Orders” to save the order definition.
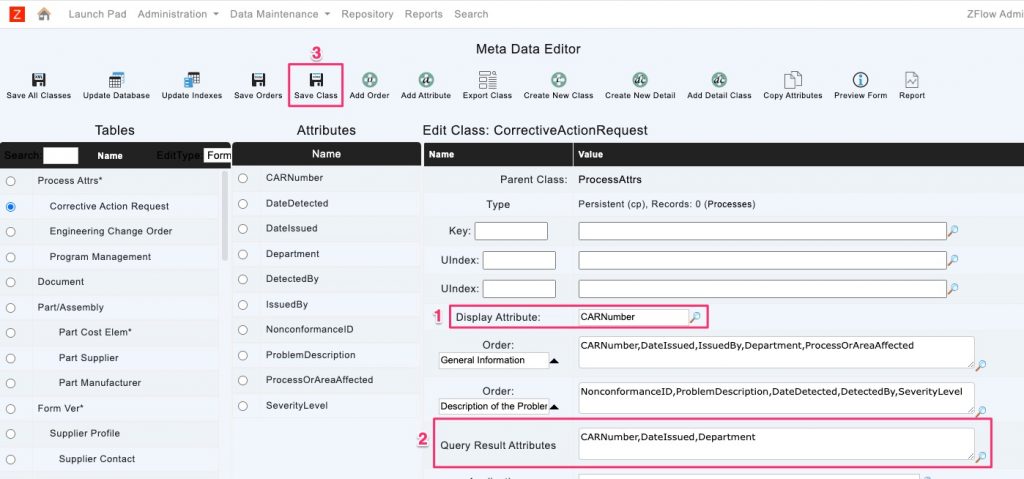
Select CARNumber for Display Attribute and CARNumber, DateIssued, Department for Query Result Attributes as shown below. Save the class.
Preview Workflow Form
You can preview how the form looks at any time by selecting “Preview Form”
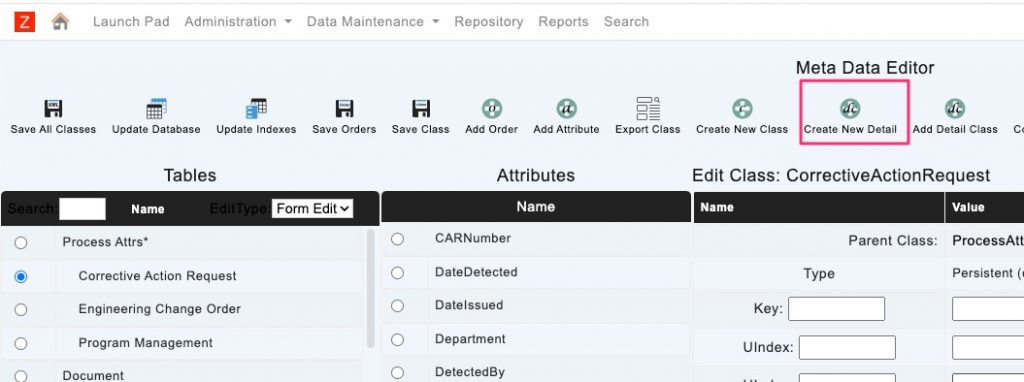
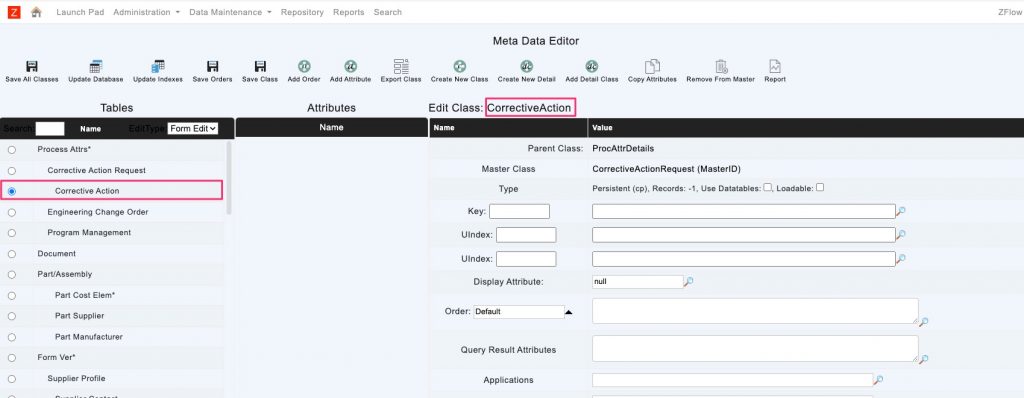
Adding a Detail Class
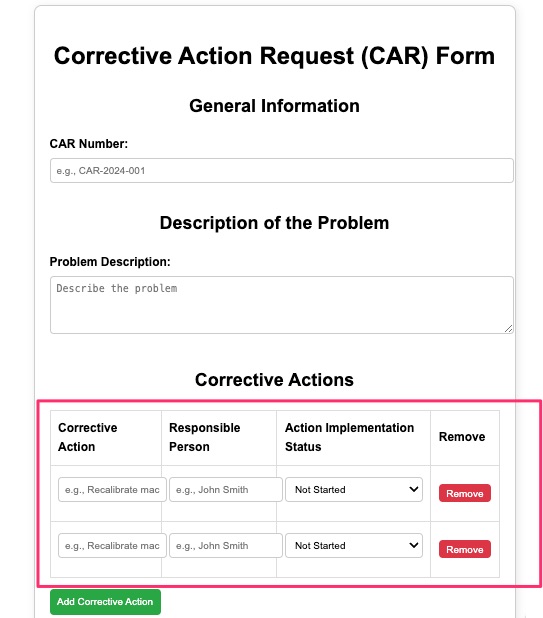
Now let’s see how we can add a table for Corrective Actions to the Process Form as shown in the example below
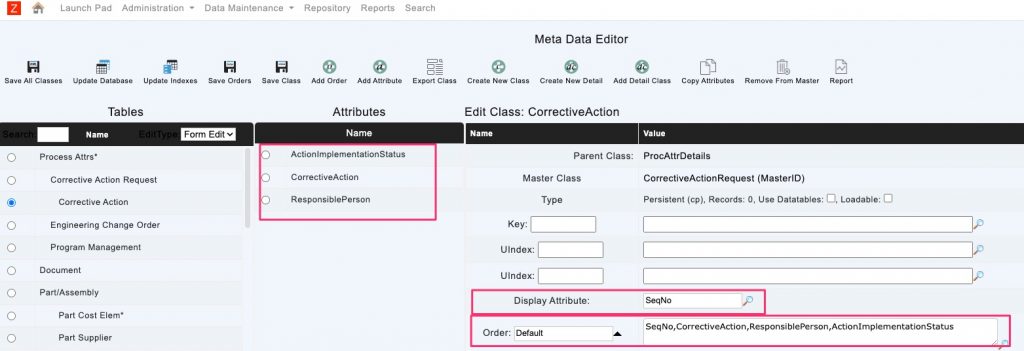
Add the following attributes to the CorrectiveAction detail class
- CorrectiveAction
- ResponsiblePerson
- ActionImplementationStatus
Once the attributes are added to the class, Save Class and Update Database to create a table for the detail class. The detail class should look like below picture once you are done.
Note: Sequence Number (SeqNo) is an attribute that is available by default for detail items. It is a good practice to assign sequence numbers for detail items as they help rearrange items in the table.
