ZFlow (on-premise installations) can can be configured with SSO with Azure Active Directory’s App Registration flow. The steps are shown below
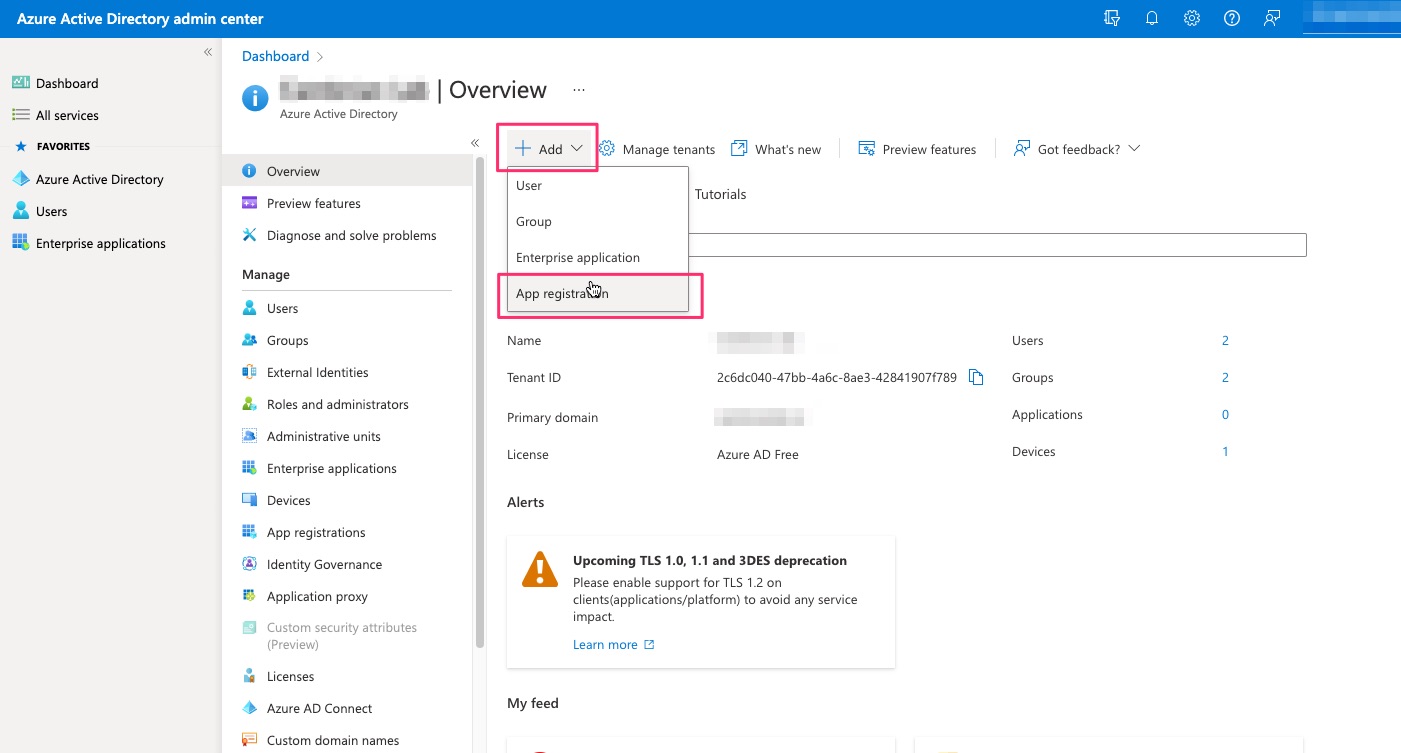
Step 1 – Add your ZFlow instance using “App registration”
Keep in mind that Azure Active Directory requires https (SSL). You should do this for both Test and Production instances of ZFlow.
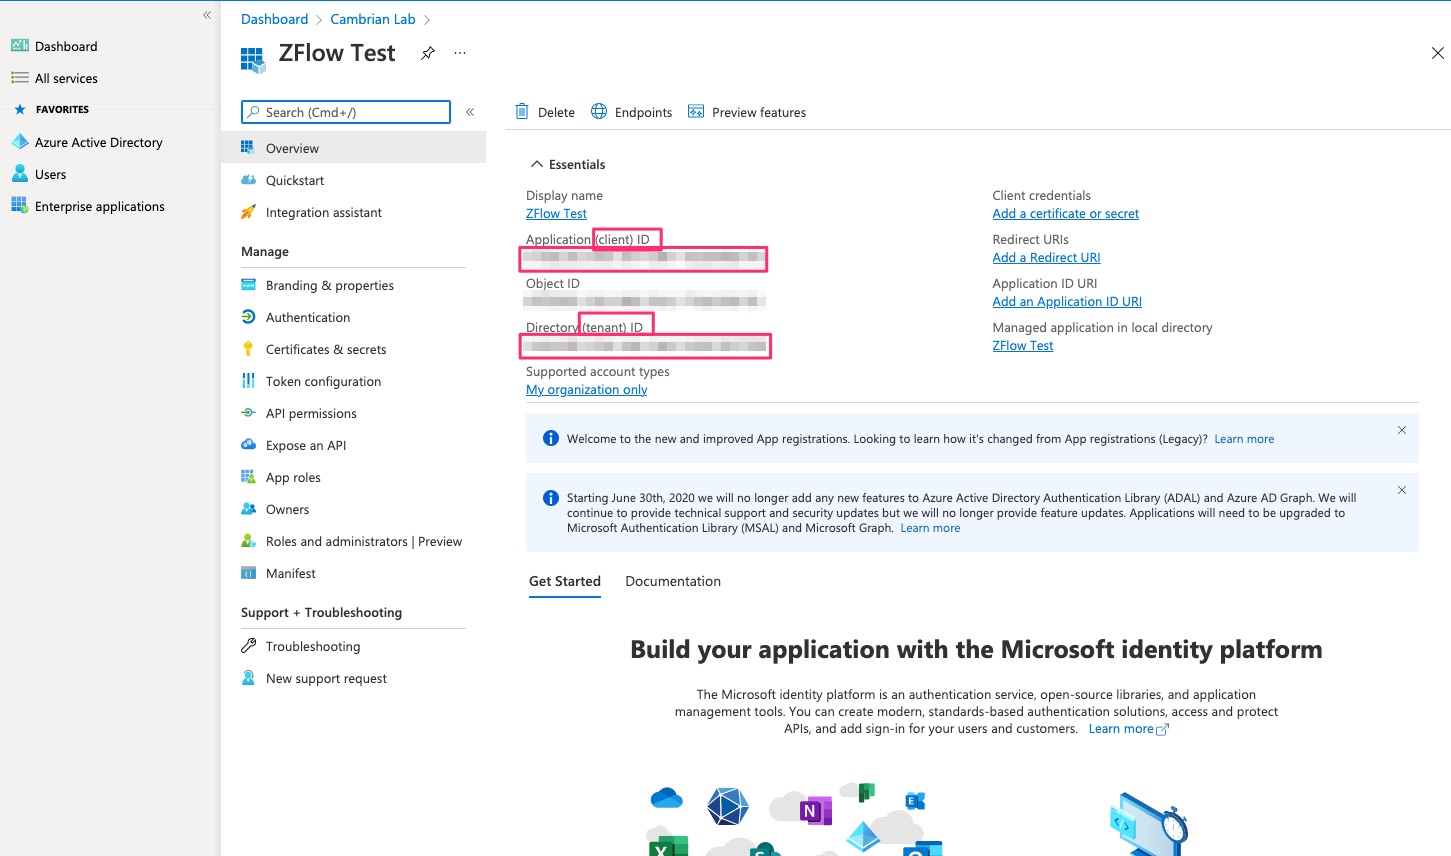
Step#2 – Register ZFlow instance

Step#3 – Keep note of Client ID and Tenant ID
Keep note of clientID and Tenant ID as you will need these 2 values to configure SSO with Azure Active Directory in ZFlow
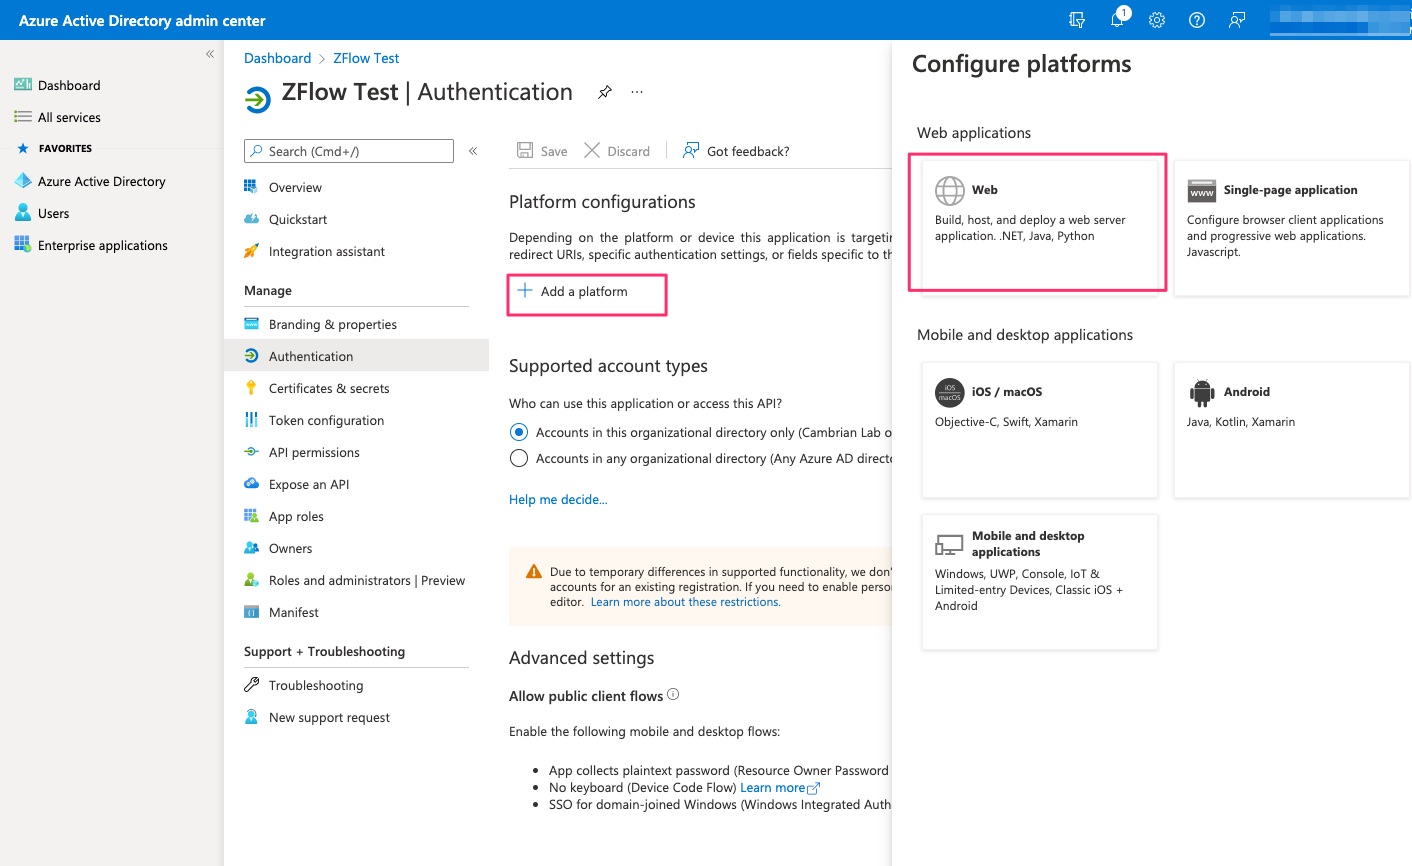
Step#4 – Add Redirect URIs

Since ZFlow is a web application after you select “Add Platform”, you need to select “Web”
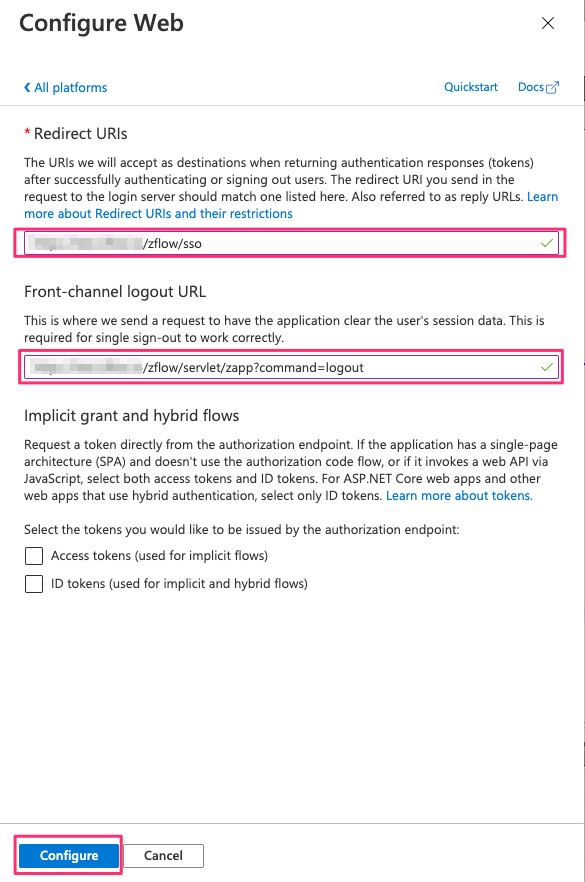
Add Redirect URI and Front-channel logout URL as shown below. The URL in front zflow should the qualified name of the ZFlow server (example – https://zflowtest.myorganization.com)
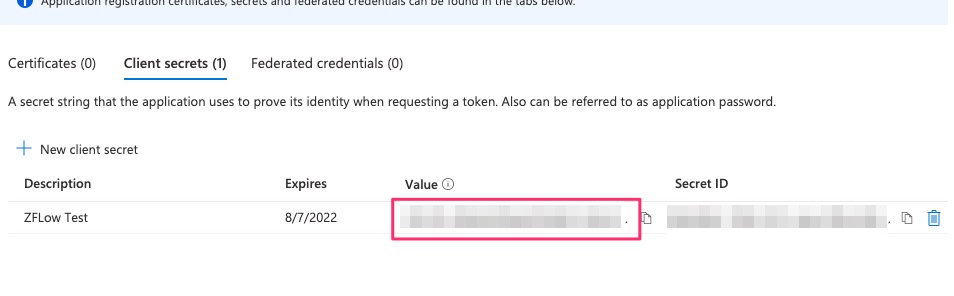
Step#5 – Add a Client Secret

Keep note of the client secret value since this is needed for configuration in zflow
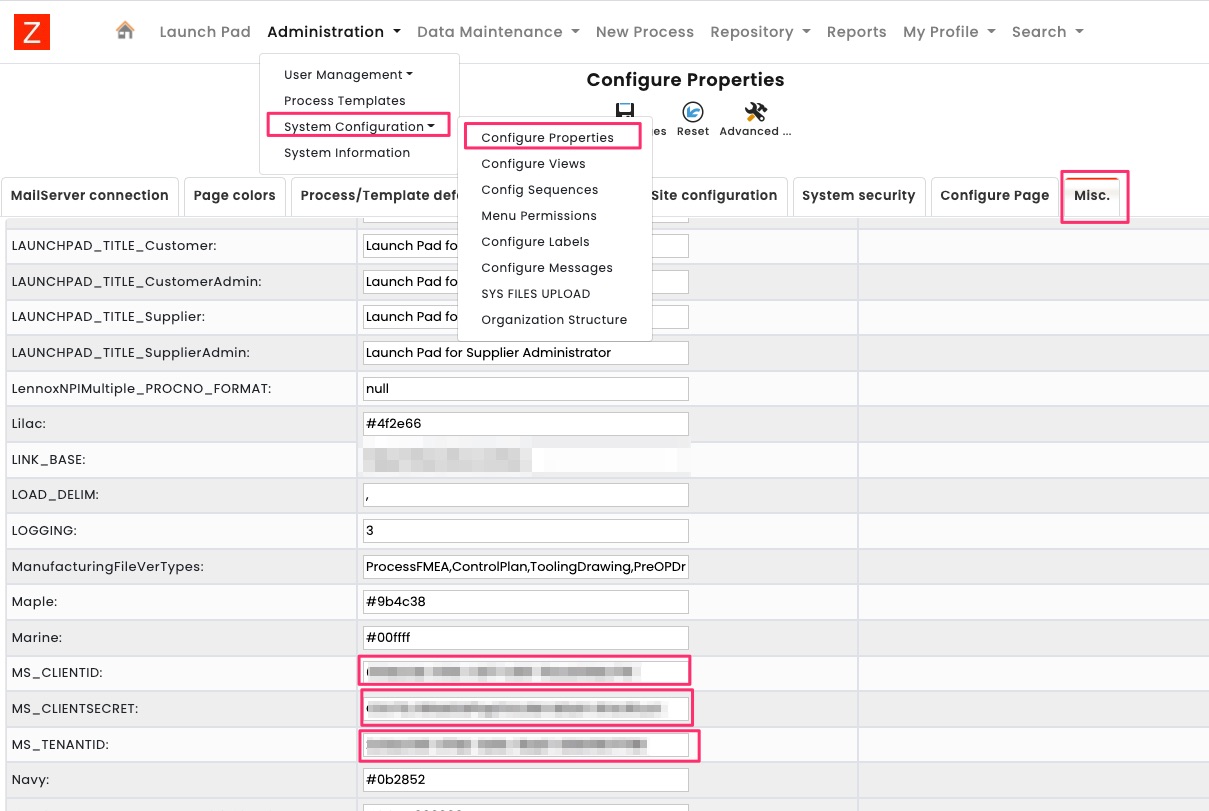
Step#6 – Configure Active Directory SSO parameters in ZFlow
You can add the following 3 configuration parameters in ZFlow to activate SSO with Azure Active Directory. The clientID, tenantID, and client secret that you noted from earlier steps are used in the configuration settings below.
Once the configuration is saved the “Login with Microsoft” button shows up in the Login Screen below. Users that are configured with Active Directory SSO only need to enter their email address and select “Login with Microsoft” as shown below.
